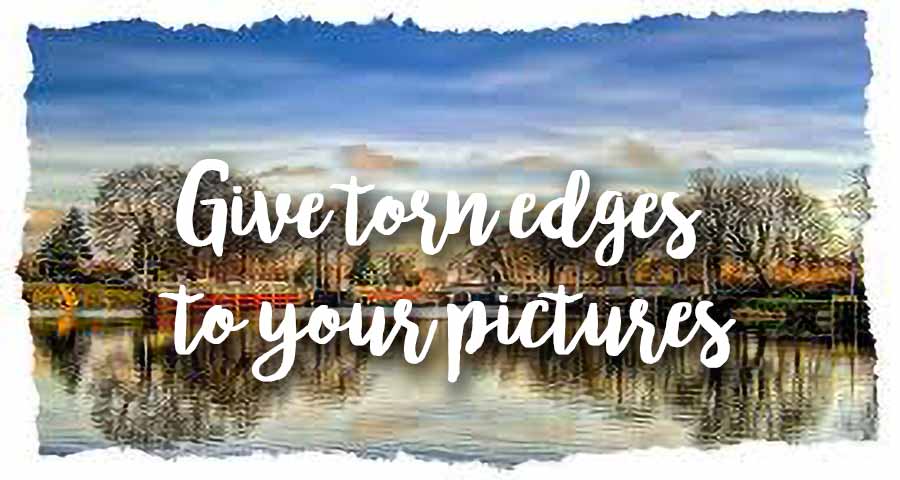
How to make torn edges
for your photos...
In the old days, photographers, those who revealed your photo by transferring it to paper, had a sense of detail! In particular, they used photo papers with torn edges, which gave them a "class" that today's prints no longer have!
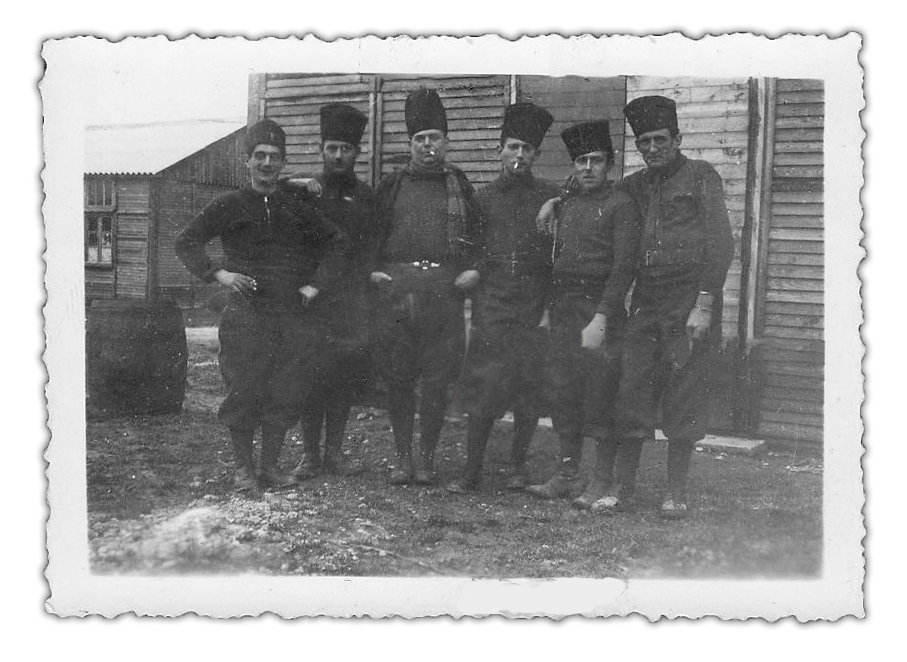
This old photo from 1940 has its crenellated edges which add to the nostalgia that emanates from it ... It was World War II and the photographers still had the sense of a job well done!
It is this "torn edges" effect that I propose to you in this page. And I give you two methods to achieve it.
These are photoshop tutorials... the second one is easily transposable to any image processor... As for the first one, which uses special Photoshop functions, it will be up to you to see what you can do with GIMP, PhotoFilter or PIXLR...
 Torn Edges tutorial 1
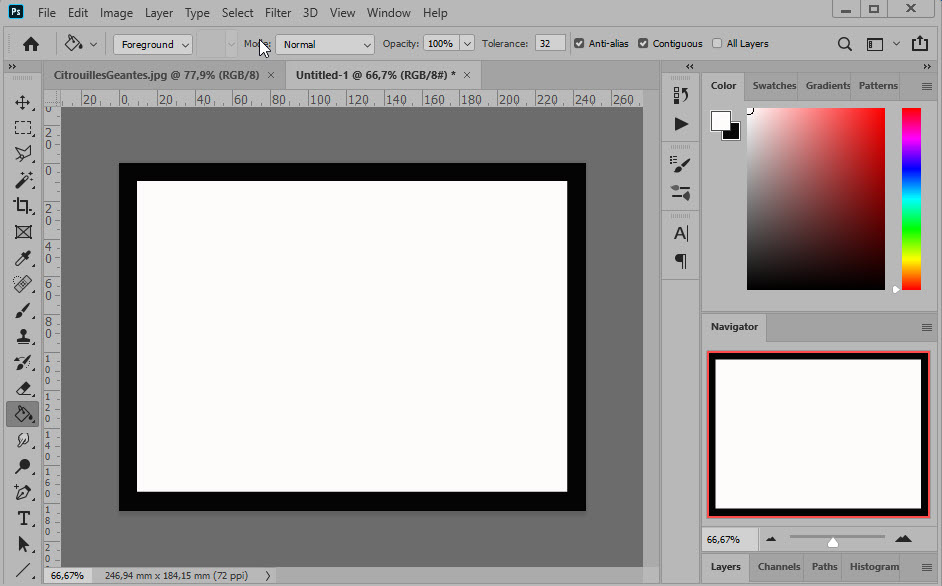
![]() You start by creating an image with a black background... It doesn't matter how big it is, but it's better to get close to the standard for photos. Here I chose 4 "x6".
You start by creating an image with a black background... It doesn't matter how big it is, but it's better to get close to the standard for photos. Here I chose 4 "x6".
With the rectangular marquee tool, draw a rectangle inside the black image and fill it with white...
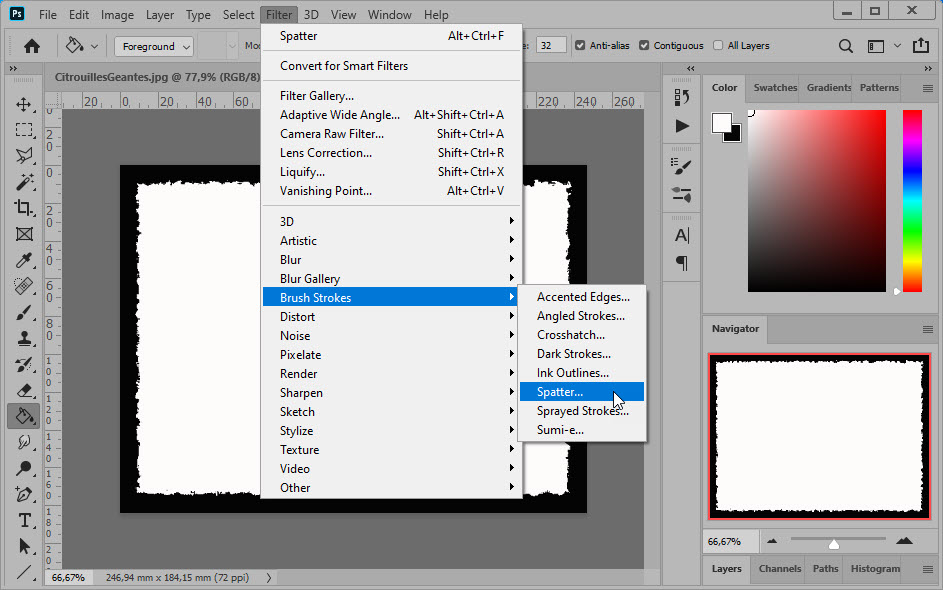
![]() Now apply the brush strokes filter and choose the "spatter" option. Adjust the settings to get a nice ripped edge effect...
Now apply the brush strokes filter and choose the "spatter" option. Adjust the settings to get a nice ripped edge effect...
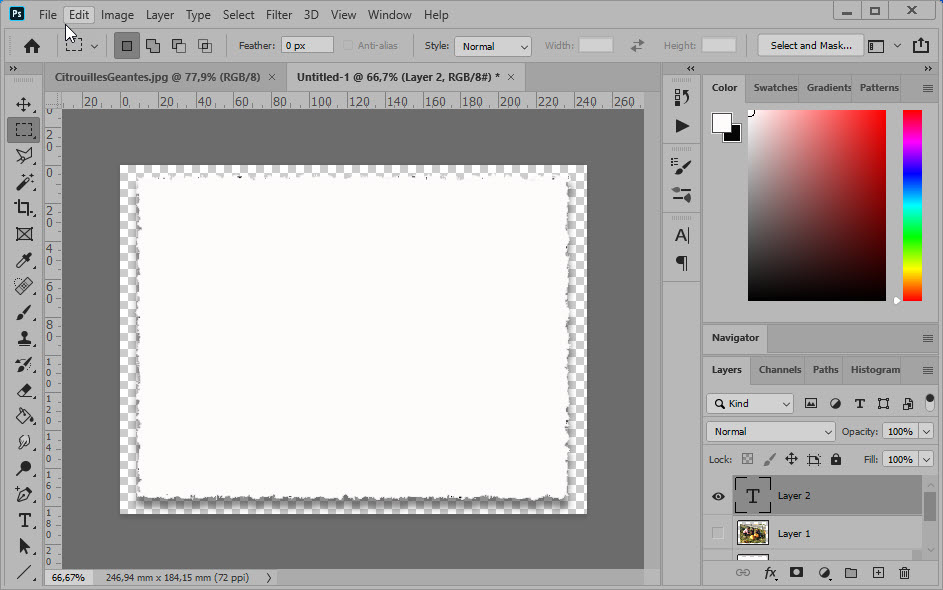
![]() With the magic wand, select the black border and remove it. Now apply a drop shadow to make the edges stand out well on the background.
With the magic wand, select the black border and remove it. Now apply a drop shadow to make the edges stand out well on the background.
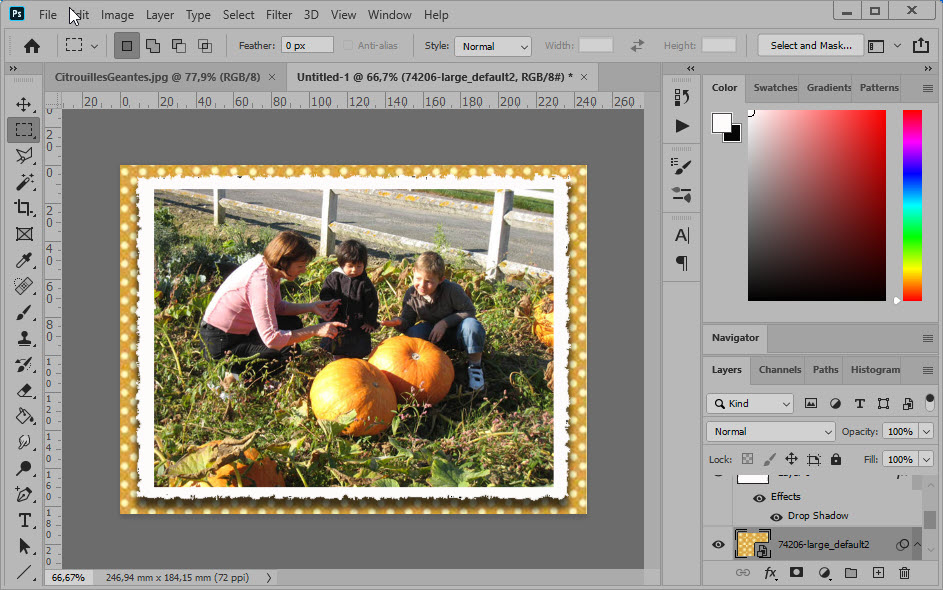
![]() All that's left to do is to place the photo on the layer containing the torn edges and adapt it if necessary by pressing Ctrl+T to make the adjustment handles appear...
All that's left to do is to place the photo on the layer containing the torn edges and adapt it if necessary by pressing Ctrl+T to make the adjustment handles appear...
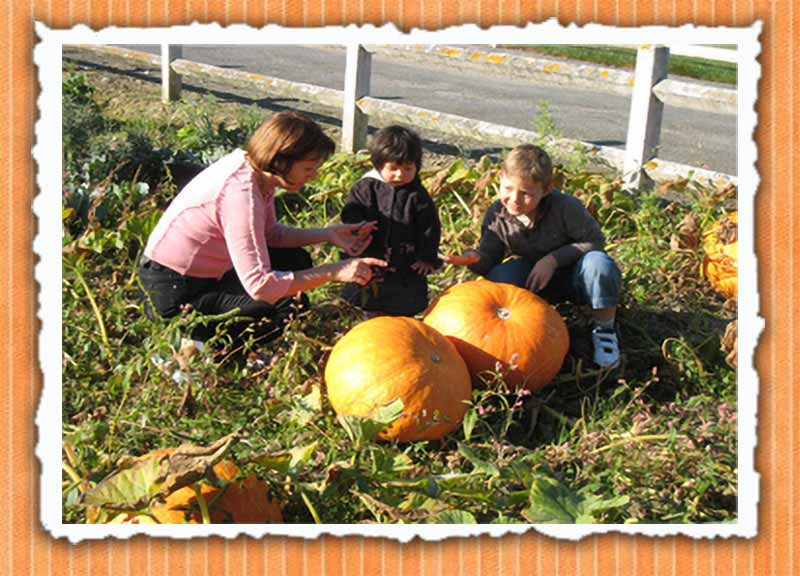
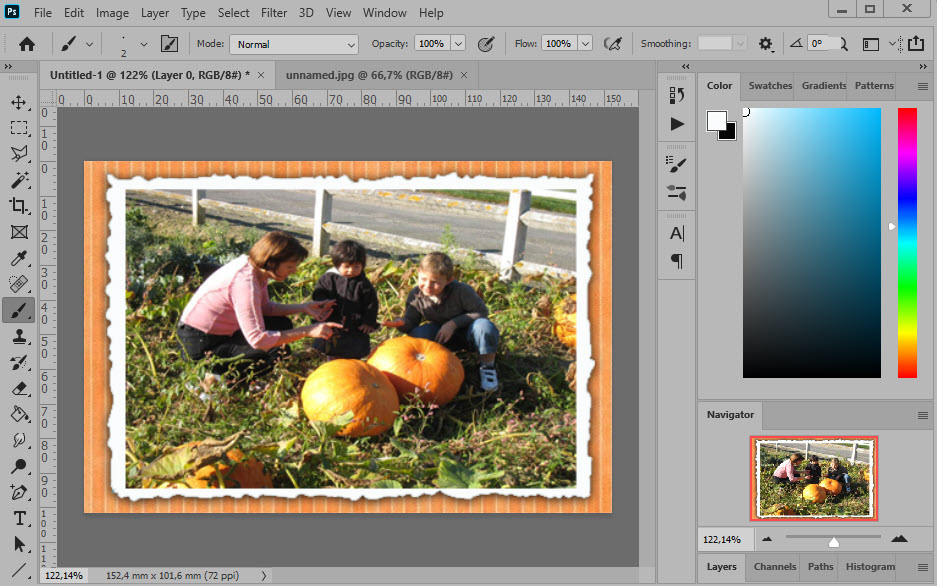
Slide behind a colored paper to match the photo. Here, we buy the color orange
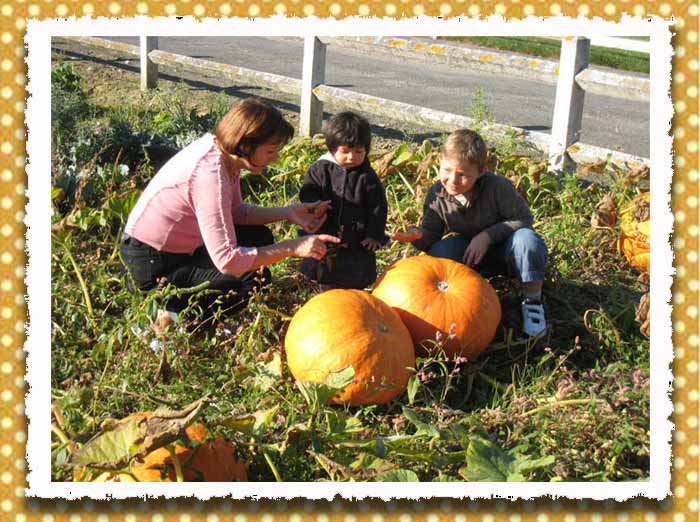
![]() And here is the final result...
And here is the final result...
Now, it's your turn !!!
 Torn Edges tutorial 2
This other method has the advantage of being easily transposed into any of the processors images you use...
![]() Start by creating a blank image on a white background in the size of a standard paper: 6 "x4" in your usual image processor.
Start by creating a blank image on a white background in the size of a standard paper: 6 "x4" in your usual image processor.
Create an inner frame and fill it with any color you like.
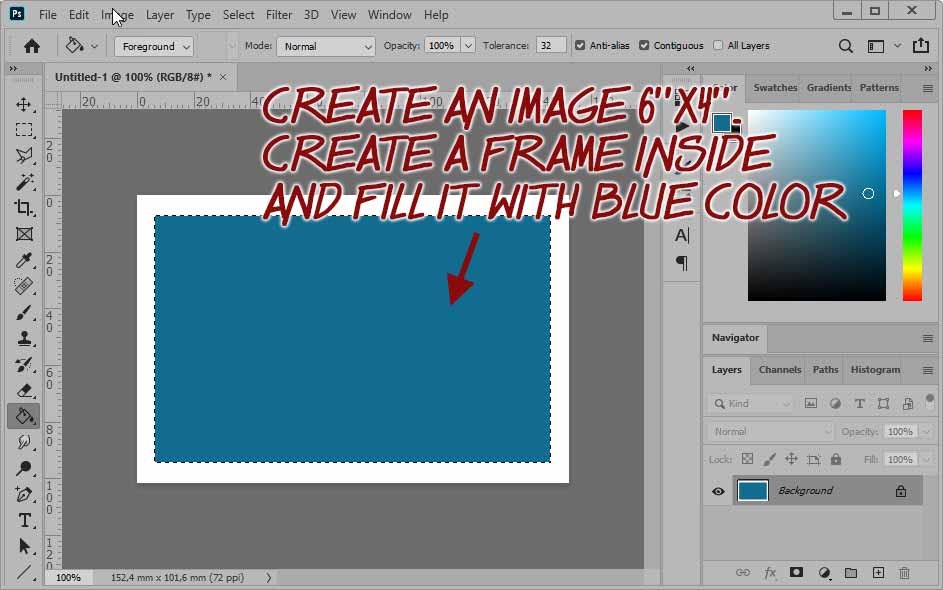
Deselect the inner frame.
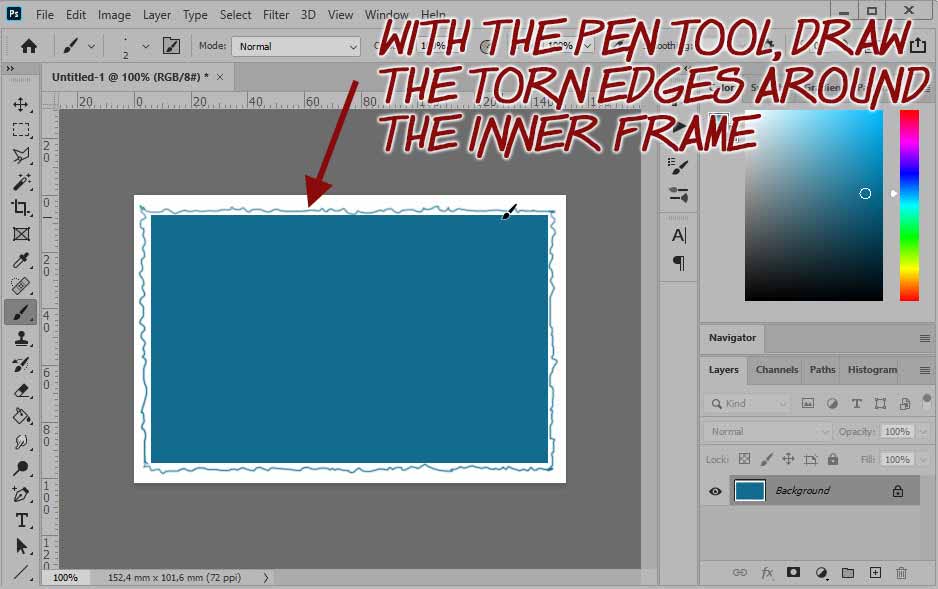
![]() With the pencil tool (set it to 2pixels), follow the edge of the frame and draw the torn edges in the white area.
With the pencil tool (set it to 2pixels), follow the edge of the frame and draw the torn edges in the white area.
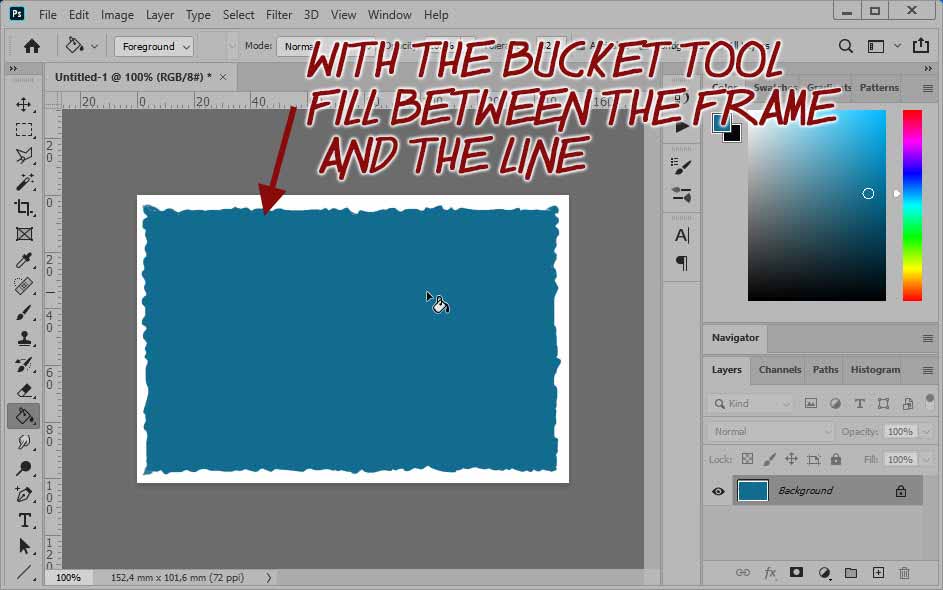
![]() With the paint bucket, fill the space between the inner frame and the line you drew.
With the paint bucket, fill the space between the inner frame and the line you drew.
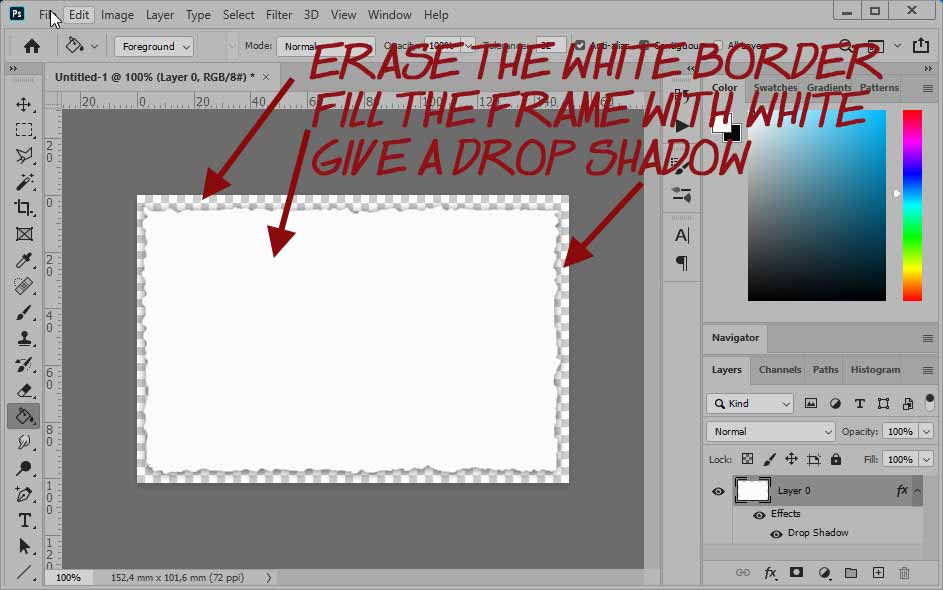
![]() Selectionnez l'extérieur blanc et effacez le. Changez la couleur interne en blanc et donnez une légère ombre portée...
Selectionnez l'extérieur blanc et effacez le. Changez la couleur interne en blanc et donnez une légère ombre portée...
![]() Vous pouvez maintenant placer votre photo en adaptant le dimensions pour obtenir un contour régulier... J'ai ajouté un fond orange
Vous pouvez maintenant placer votre photo en adaptant le dimensions pour obtenir un contour régulier... J'ai ajouté un fond orange
![]() Et voilà le résultat final !
Et voilà le résultat final !