SUPPLIES TO MAKE WOOD PICTURE FRAMES
Equipment to be provided
 Miter box or Picture framer saw ?
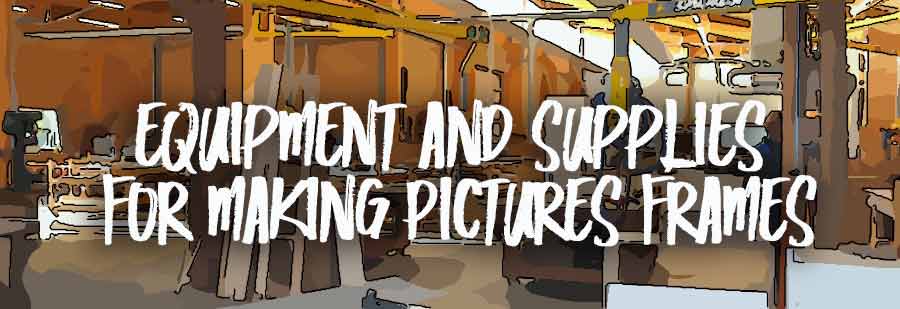
Necessary ans essential to make a wooden frame : the miter box. The investment can vary from $3 to $250 and more depending on the use which you provided for it.
 If you only have one frame to make ...
In this case, a simple miter box is largely sufficient. The investment will be very moderate: a model like that shown on the picture is worth between 3 and 20€, with the special saw (you can still find less expensive in DIY stores like “BRICODEPOT" for example).
AMAZON is my only reference from Europe ... so I leave you links to their site. I saw this model : $12 !!!
Prefer metal miter box or hard plastic made... it retains its correct "angles" in time!
 If you have to make multiple frames ...
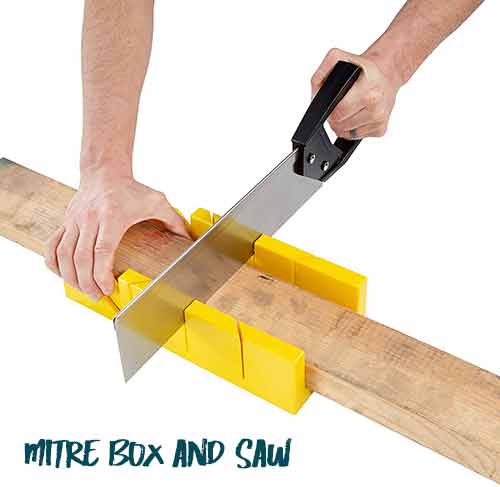
No hesitation! Invest in a metal picture framer saw : first prize HERE. Very accurate, it retains its quality over time (if you take a little care of the hardened steel blade). Removable presses keep up the moulding when you saw it, which guarantees the required accuracy. Several angles are possible, including of course those 45 degrees which interest us. It can also be used for other DIY jobs!
Important : for a better accuracy don't forget to use the "stop" of this saw !
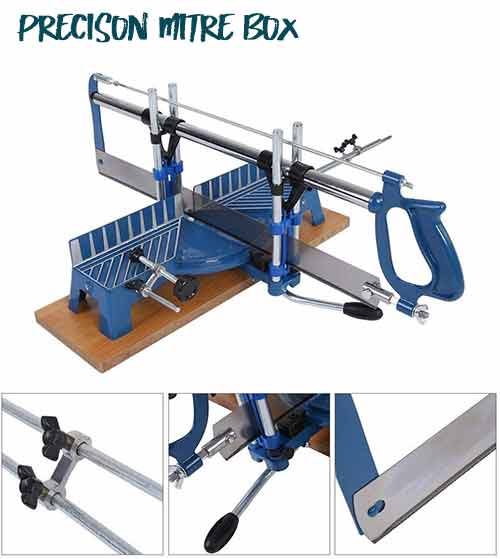
 If you get started a picture framer job...
An electric miter saw : it's the Ferrari of DIY framers! The investment is more consequent without exceeding the reasonable one. The first prizes are around $100 for a Chinese equipment, which works though!
In USA, You can find models : HERE for about $150. Models with longitudinal displacement (for those who have a wood floor to install later) have a cost starting from 80 € and allow the cutting of larger widths (> 20cm).
It's better to buy a sliding model you can use again for others works..
.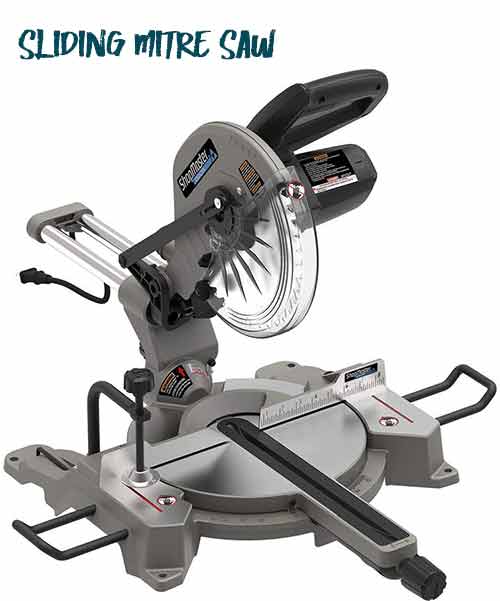
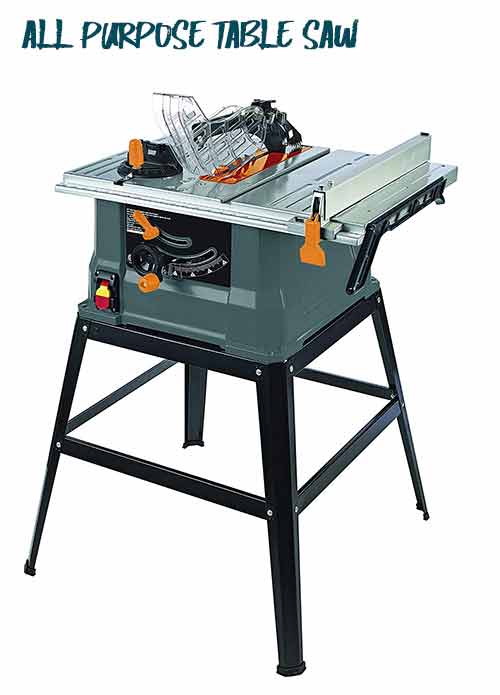
 Luxury and comfort ! The table saw !
I recently had the opportunity to cut my mouldings with a table saw... Luxury and comfort! The angle guide that slides along a groove allows cuts to 45 ° and carbide blade provides a clean cut without burrs.
There is a small tip to know ... and you'll learn that very quickly : once the guide angle is set to 45° (even if the setting is not strictly accurate it works anyway!) it is not necessary to change the setting to cut the 2 ends of the pieces of the frame ... You'll automatically obtain 90 ° assemblies, because any slight mistake made on a bevel angle is automatically compensated by the second Cut!
The price ... Well when you think how much does a single picture frame costs in a art store... if you have place to arrange it at home... the tool will often re-used to tinker ... $150 ... not too costly (Leroy Merlin). At this price, it is not a professional tool... but believe me, it works very well anyway. Moreover, you yourself pourrrez debit your cleats ... additional savings! Moreover, you will be able to cut your cleats by yourself… additional economy!
In USA, you can find for a low cost this ROCKWELL model of table saw (less than $180) : good quality and very affordable ! See for this similar model
Click HERE to see all other table saw models.
 Router, Shaping Machines
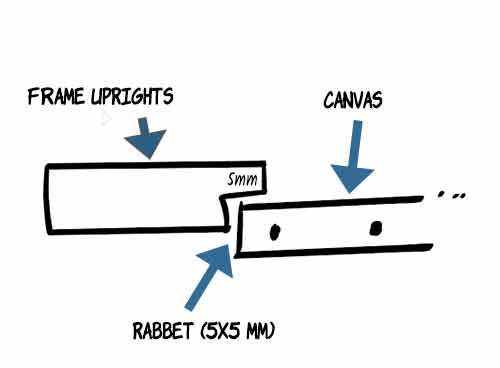
When the do-it-yourselfer wants to build a frame moulding, the problem of the rebate inevitably arises... How do you build this rabbet easily? Several solutions are available to you!
 Making a false rebate
You create a false rabbet by gluing two battens with an offset of 1cm ... so you will have the recess in which the canvas or the "package" of your work is slipped.
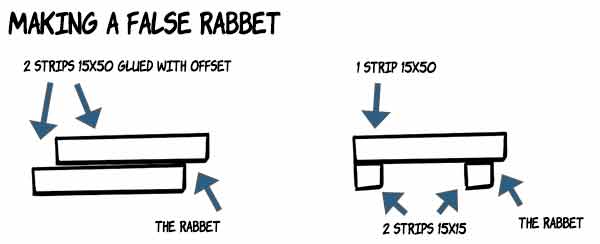
In the second illustration, two 15x15 strips were glued: one to create the rabbet, the other to give thickness to the edge of the frame.
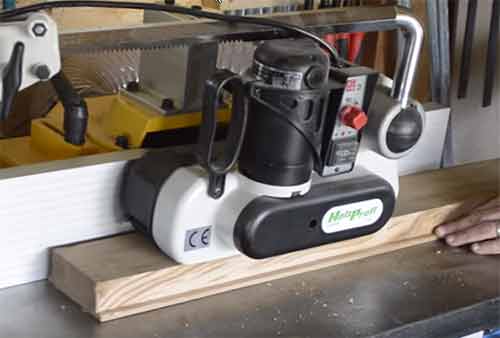
Create the rabbet with a router
The router is the most suitable DIY tool for creating a rebate on a batten. Once the right wheel is chosen, the work is fast and always neat.
Buy a rebatting router bit with different bearings to set the depth of the rabbet.

Use a woodworking machine
This is no longer do-it-yourself but rather semi-professional because few people own the routing equipment...
Note that if you own a router, you can transform it into a router tool by adapting it on a special support which transforms it into a stationary machine : the benchtop reouter table which can turn out to be very parochial in use.
 LUMBER, CLEATS and MOULDINGS
Picture frame moulding can be obtained at framing stores, art stores and larger DIY stores.
Builder's moulding and lumber can be found at your local home improvement store.
Don't forget to ask professional carpenters about off cuts...
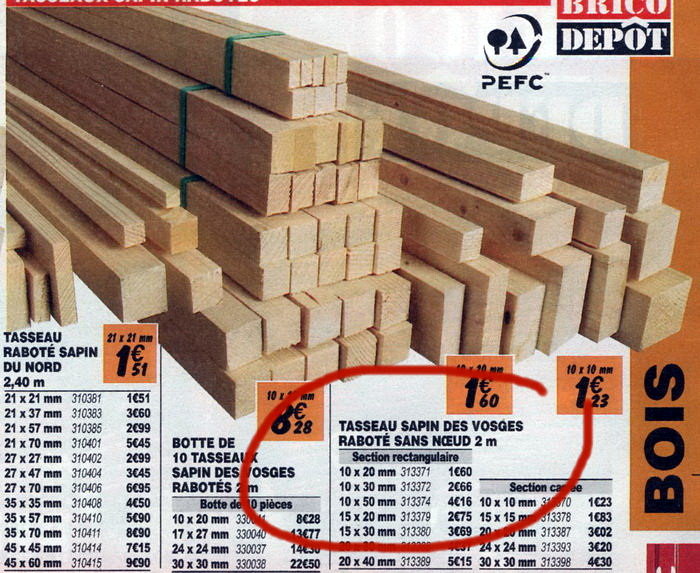
Cleats or lumbers are available in 10, 20,30 and 50mm width and 10 mm thick (see page Flat frame).
You can builder's mouldings... that you will join to create your own mouldings and make this classic frame.
If you have a table saw you ca cut by yourself all strips you want to build picture frames !
The length to buy is on demand and therefore depends on the picture you want to frame. Dimensions are not critical, you fit to your personal situation: have lumber or strips of all sizes.
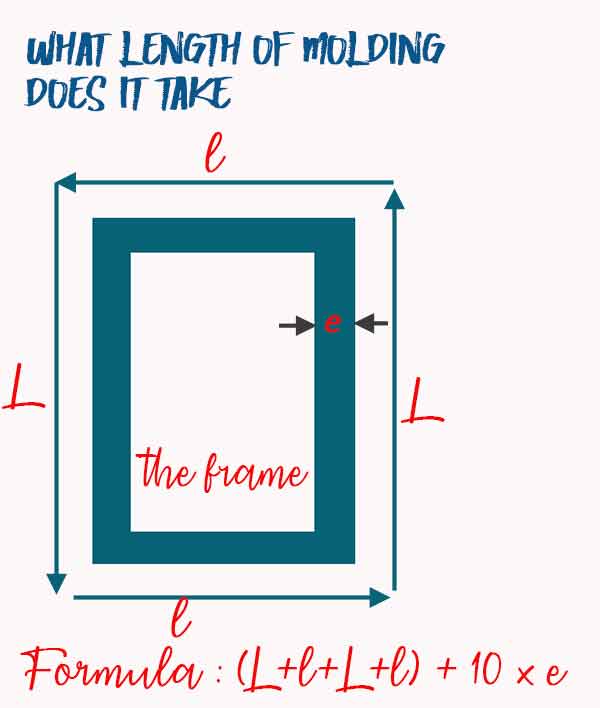
To see how much molding to buy or build, calculate the perimeter of your frame and add 10 times the width of the molding. For example, you want to build a 41x33cm frame with a 5cm wide moulding. You must provide 2x41 + 2 x33 + 10x5 or 198 cm of moulding.
You can make beautiful floater frames (in France we call them "American box") with fir wood plinth (purchased in lengths of 2m)... The only limits are those of your imagination!

If you have a table saw, you can produce your own mouldings from timber trade, where additional savings.
You can also buy the moulding "ready-made" in specialty craft stores. Doing one's own picture frame is in all cases less expensive than buying a ready made one. So don't hesitate to buy tools... you'll save money!
 GLUE and CLAMPS
The wood glue is to be taken seriously! If you want a good performance for your frame, you need a truel wood glue, tube or bottle, no schoolboy cellulosic glue as we see sometimes!
So much for the free advertising that I make for them : but if you take PATTEX polyurethane exterior glue its good ! The collage is fast and powerful as long as you can press parts during the glue drying. This glue tends to expands when it dries which put right any small fitting defects .
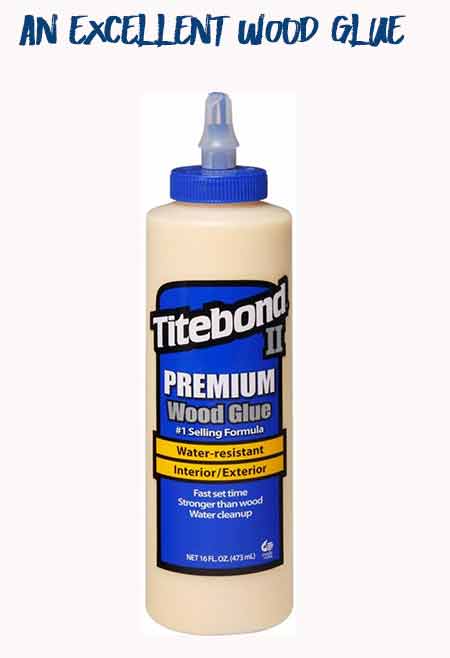
In states, the good glue is "TITEBOND"... there are many others but this one is excellent !
Add some clamps to holdparts during glue drying time.
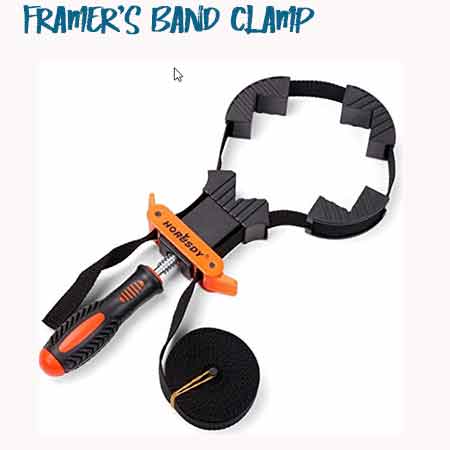
There are many different models... the more efficient is a framer band clamp ... to strip even more effectively: I found one, with a band-strap, at BRICODEPOT for less than € 8! For people living in USA, I recommend this picture framer clamp (less than $16).
See here for Others Band clamp Models
If you're a handyman... you can build your own picture framer clamp: see HERE. It is multi-purpose and you'll use it whenever you have a complicated form to tighten (frames, chairs, boxes ...)
Leave your frame tightened during 4 or 5 hours for the faster wood glues , 24H for others. Sand then the assembly to remove burrs and small adhesive assembly defects.
 PAINT
PAINT
The finished frame can be stained and varnished (yes, yes, it still pleases!) In this case, a careful sanding followed by 2 coats of tinted and satin varnish are needed.
But mostly, you have to paint your completed frame. Begin by filling-up potential holes and wood defects with an acrylic coating (which has the advantage of quickly drying). Then sand lightly.

Choose a single layer acrylic paint color that fits with the place where you'll hang the frame. Spray paint can also be useful: its advantage is that it dries very quickly and that its spread is uniform. The finish of the frame will be even better.
Color selection depends on the work you have to hang. To play with complementary colors, here is a link that takes you to the color wheel : handy for playing with harmonies or contrasts. You can find explanations on its use HERE.
Making Picture Frames in
Wood
Manly Banister
Create all kinds of picture frames from simple wood mouldings to elaborate carved types.
Clear instructions on matting, texturing, finishing. Fully illustrated with photos and diagrams.
It's the Best of the inexpensive books.
How to Make Your Own
Picture Frames
Ed Reinhardt, Hal Rogers
Hal Rogers and Ed Reinhardt are eminently qualified experts on picture-framing-both from the craftsman's standpoint - They have been making their own handsome frames for years - and from the esthetic standpoint-both are accomplished professional artists.
It's the 3rd edition !