Try to imitate Roy Lichtenstein!
Roy is a genius of the pop-art imaging
Roy Fox Lichtenstein, is one of the most important artists of American pop art movement. His works draw to draw one's inspiration from advertising and popular imagery, as well as "comics" (BD).
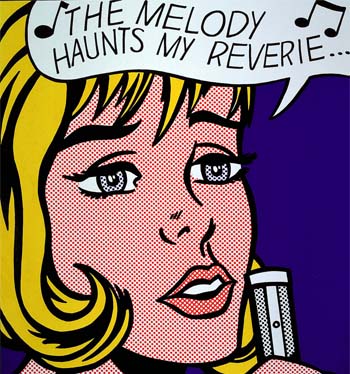
The pop-art paintings by Lichtenstein we are interested here, seem going out of a comic strip ... They are characterized by the density of the line delimiting the surfaces thoroughly, the deliberate choice of contrasting colors, the almost permanent presence of bubbles and onomatopoeia and the use of rastered color (ben-day dots) including to create the "pink" dotted faces ...
This page is an attempt to paint "in the manner of" Roy Lichtenstein.
 Working with the graphic tablet
Roy Lichtenstein had surely not the equipment we have today ... Including ease offered by a good graphic tablet and the technical nature of PHOTOSHOP !
- A graphics tablet
Essential to tackle this technique. If you do not have one, it's almost a chance to pick one ... and there are several options available to you ...
- If you are new ... not need equipment too elaborate : You'll take a lot of fun with an entry level graphic tablet that will not cost you more than a mouse!
Buy it in an seriously online-store both in terms of choice and also at the customer service ... this would be a shame to have to renew all the material when, inadvertently, the pen is dropped and no longer works properly!
For these "entry level" models, you will be not puzzled for choice: all online-stores sell them... Compare only prices before to buy !
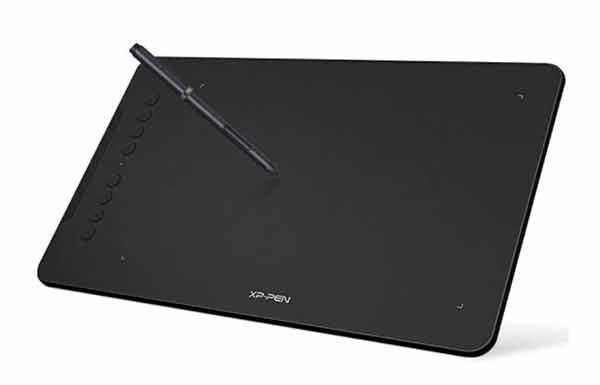
Here is a good choice to start...
This excellent model from XP-PEN that will suit all beginners and even more!
Sufficient working surface, a passive pen without batteries and easy installation... excellent choice for the beginners.
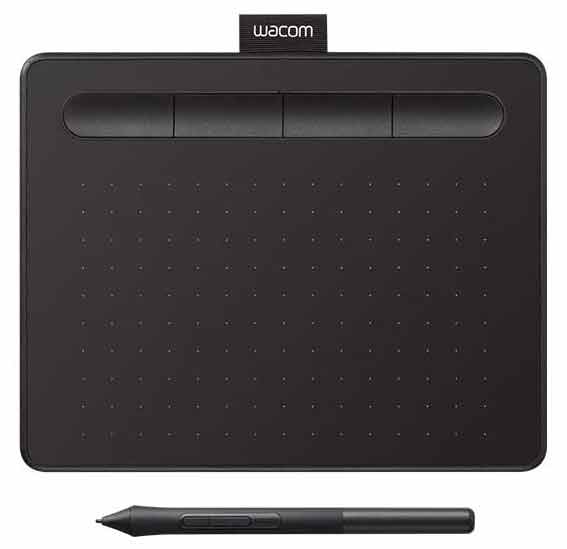
- If you've already practiced ... THE brand is: WACOM. It is the leading expert in the graphics tablet. Bamboo or Intuos models. Choose an intermediate model ... not too small (must have his ease!) not too big (to be reserved for professionals!). Bamboo CTL 4100 is a good compromise !
Choose a work surface of about 8''x6'' ... is perfect for an amateur work ... The A6 is too small ... A A5 working area is perfect.
You can find this tablet for approximately 80$ on AMAZON... and elsewhere!
Of course, the use of this tablet will not be limited to the imitation of Lichtenstein! It will often be requested if you do retouching your digital photos ... and when you get used to your graphics tablet, you no longer use your mouse!
- An image processing software
The most famous Photoshopwhich learning is not always easy ... Paint Shop Pro, The Gimp(free) or PhotoFiltre (free) are good alternatives ...
In this tutorial, we use Photoshop ... and simple functions you can find in your favorite image processor.
 Tutorial :
Lichtenstein inspired pop art
For this tutorial, I chose a female face: the TVnews reporter NATACHA. If you want to work with the same sketch, you can download it here .
Step 1 The line drawing.
Start Photoshop and open the image-model. Select the brush tool and press F5 to open the menu forms. Check the Shape Dynamics.
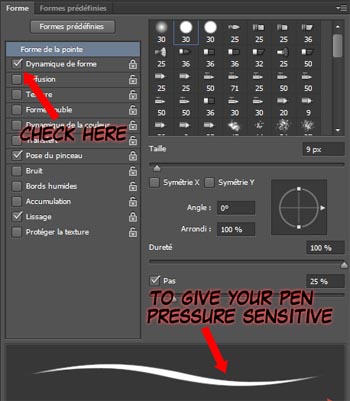
Thus the thickness of your brush stroke becomes pressure sensitive ... Also select a brush with clean edges (possibly set the hardness to 100%).
Create a new image (File> New ...). Give it a white background and create a new layer with a transparent background on which you draw your line model ... Name this layer "LineSketch".
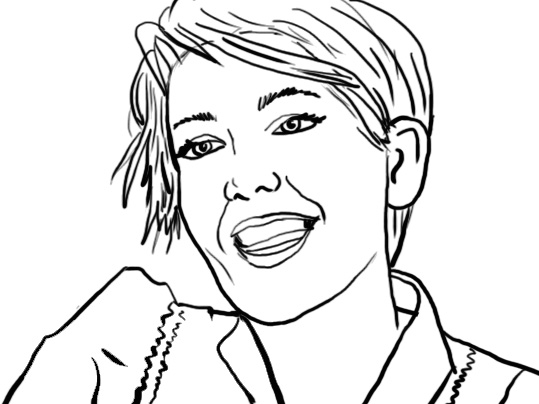
Feel free to simplify the drawing, keeping only the essential features ... exaggerate the shadows by drawing thick black lines.
If you do not have a graphics tablet, or if you do not want to draw directly on screen, you can also first draw on paper the sketch of your "TVnews reporterf" ... and then scan your drawing to after color it with Photoshop ...
Step 2 Setting colors
. You now colorize your image. The colorization technique used here has nothing to do with professional techniques for coloring! This is to keep it simple but effective!
Create a new layer "Color" that you put under the layer "LineSketch" (you can put the latter mode product).
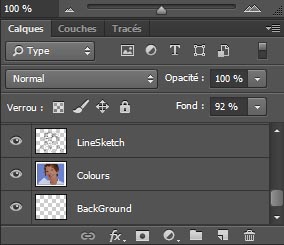
Select the paint bucket tool ... and its options, check contiguous pixels and all layers.

In the color palette, choose a pink hue and color the face with the "bucket". If color overflows all over the layer, verify that the options are checked and that the contour line of the face is closed ...
Continue by coloring in the same way the other parts of the character: the lips, eyes and the scarf using two different shades of blue.

Step 3 colors Ben-Day dots like
It's time to give our image dithered colors so characteristics of the work of Roy Lichtenstein ...
Duplicate the colors layer and with the magic wand, select the pink color of the figure ... In the screenshot below its name is "layer 0 copy 2".
Select Filter> Pixelate> Color Halftone. It is this filter that will replace the "flat areas" of solid color by these ben-day dots ... It will take a little trial and error to adjust: the points should not be too close nor too far away!
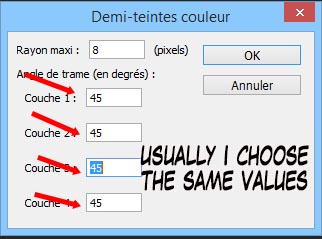
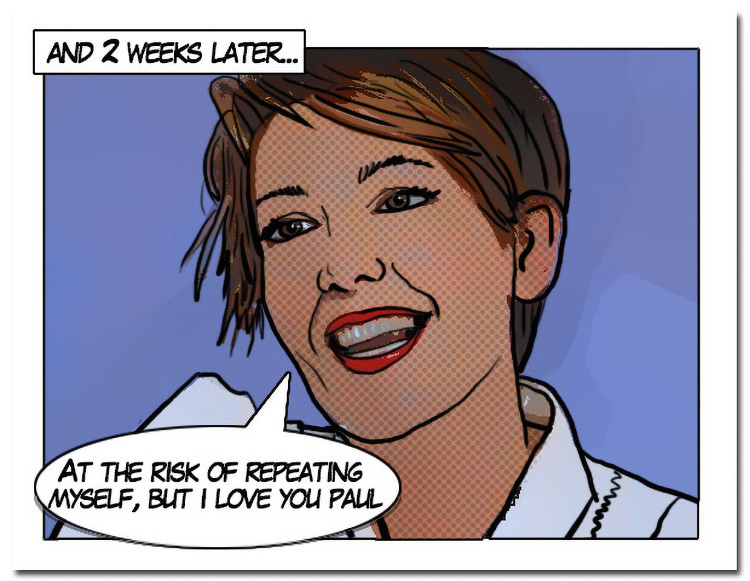
For example, choosing a radius of 5 seems appropriate as shown by the result:
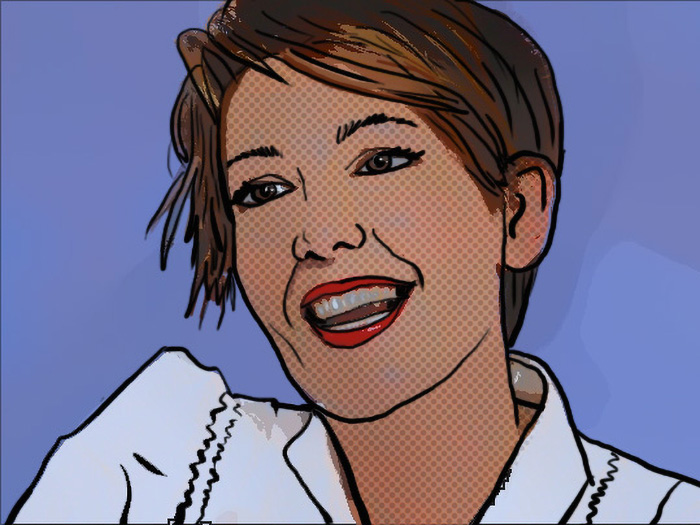
(Note: the original of this portrait ... measures 40x30cm. On the screen, dots are not enough visible, it's only a question of scale!)
Step 4 Bubbles and Onomatopoeias
It only remains to finalize the image ... by adding a solid color background, and a bubble (a constant in R. Lichtenstein' work).
You can draw the bubbles directly with the Freeform Pen toolfrom the toolbar: curves are automatically smoothed... It suffices to transform the path into a selection (right click and select from the dropping menu) and fill this selection with white ... then give a fairly thick black inner contour. (Edit>Stroke)
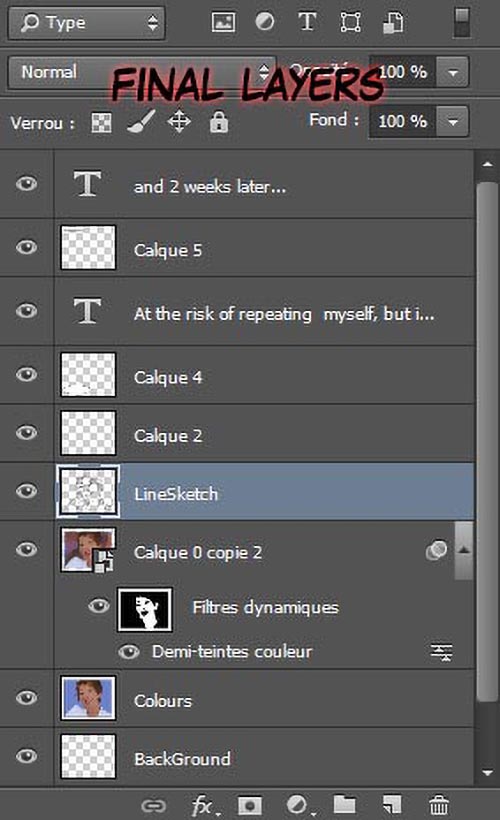
I choose the font Laffayette for the text in the bubble and for the onomatopoeia ...
Here is the final result.
GD
Whaam! The Art and Life
of Roy Lichtenstein
Susan Goldman
Rubin (Author)
Susan Goldman Rubin evocatively explores Roy Lichtenstein’s work and life and his groundbreaking influence on the art world...
Roy Lichtenstein
(Taschen Basic Art)
Janis Hendrickson
This is book is part of Taschen's "Basic Art" series, and is a nice overview of Lichtenstein with some really nice images of his paintings
Roy LICHSTENSTEIN
in his studio...
Roy Lichtenstein in His Studio is a portfolio of vivid and engaging photographs by Laurie Lambrecht,
